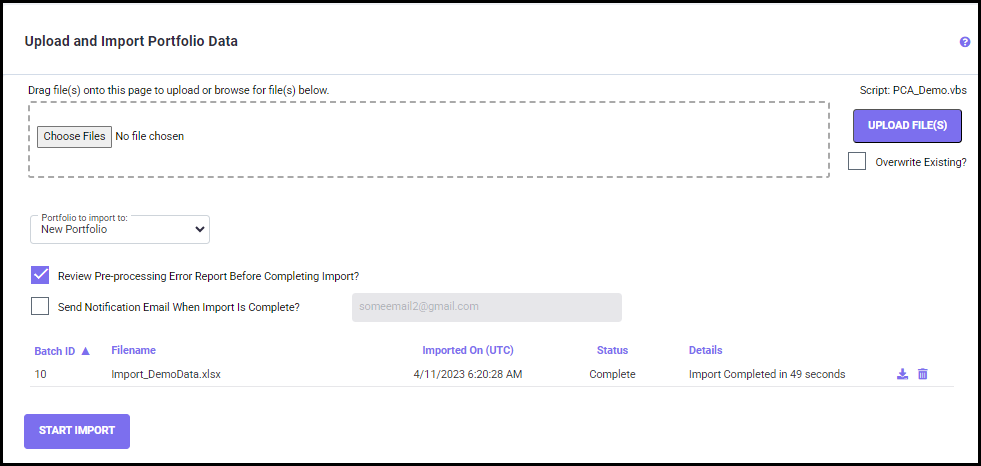
Selecting the "Send Notification Email When Import is Complete?" checkbox helps you to get the import status update via email. To get the status in email, check off the option to send a notification and type your Email ID in the text box (shown below).

Here, the import batches are sorted by the following:
· Batch ID
· Filename
· "Imported On" date
· Import "Status"
· Details
Before you attempt to import your data for the first time, make sure you have contacted the Support team for the initial import template preparation and setup. This process is typically done only once, allowing you to re-use the import template in the future, as long as your data format stays the same.
STEPS TO IMPORT
Step 1: First choose which Portfolio the files need to be imported into. You can import to a New Portfolio, or the Default Portfolio by choosing from the "Portfolio to import to" drop-down list
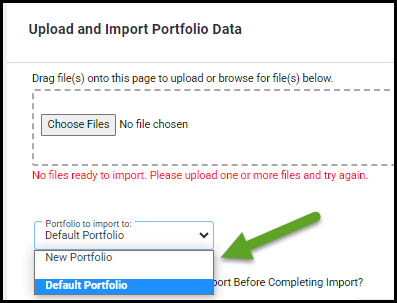
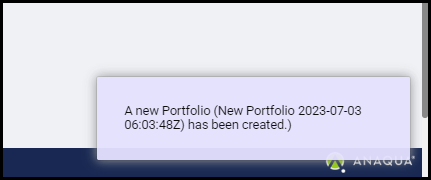
If you choose New Portfolio from the list, a new database with current date and time will be created (shown below). You can also create a new database by going to Settings > Portfolio Names screen.
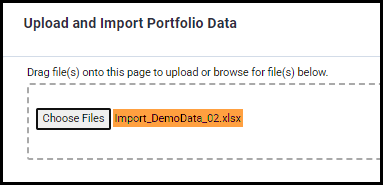
Step 2: Click on the "Choose Files" button to import the data file in Excel format. Then, select the Import file and click Open. The selected file name is listed on the Upload and Import Portfolio Data screen (shown below).
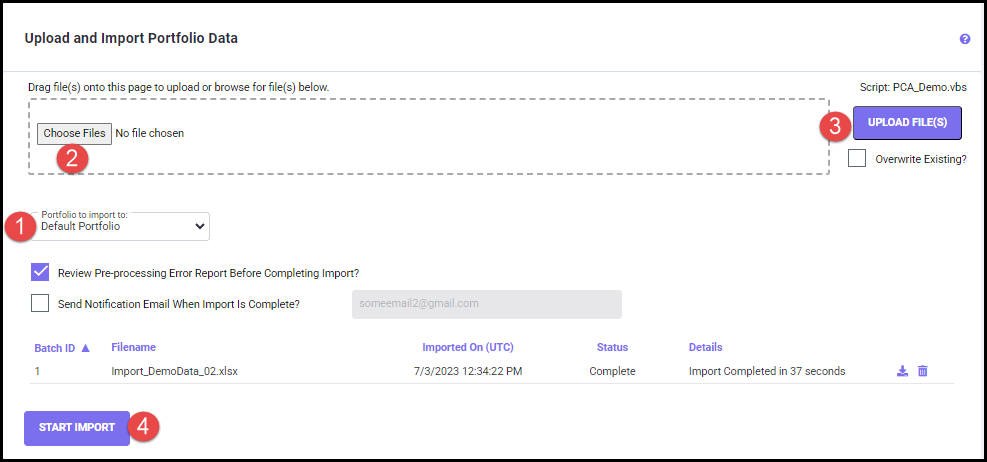
Step 3: Now, click on the UPLOAD FILE(S) button to upload the selected file on the server.
The Overwrite Existing checkbox allows you to overwrite the existing files with the new upload.
If you check off the "Review Pre-processing Error Report Before Completing Import?" checkbox, the program runs pre-processing error checking of the import file first, and then estimates dates and costs for the data imported.

Once the Status changes from "Upload" to "Awaiting Review," you can download and review the Error report by clicking the download icons.
After reviewing errors and warnings, you may decide to continue the import or cancel the import by clicking the corresponding "Continue Import" or "Cancel Import" icon.
When there are any issues with the import file, the status may show "Failed." If this is the case, please check the import file again and re-do the import process from Step 1.
Once you continue the import, the status changes to Approved (shown below). Now, your data is imported successfully.