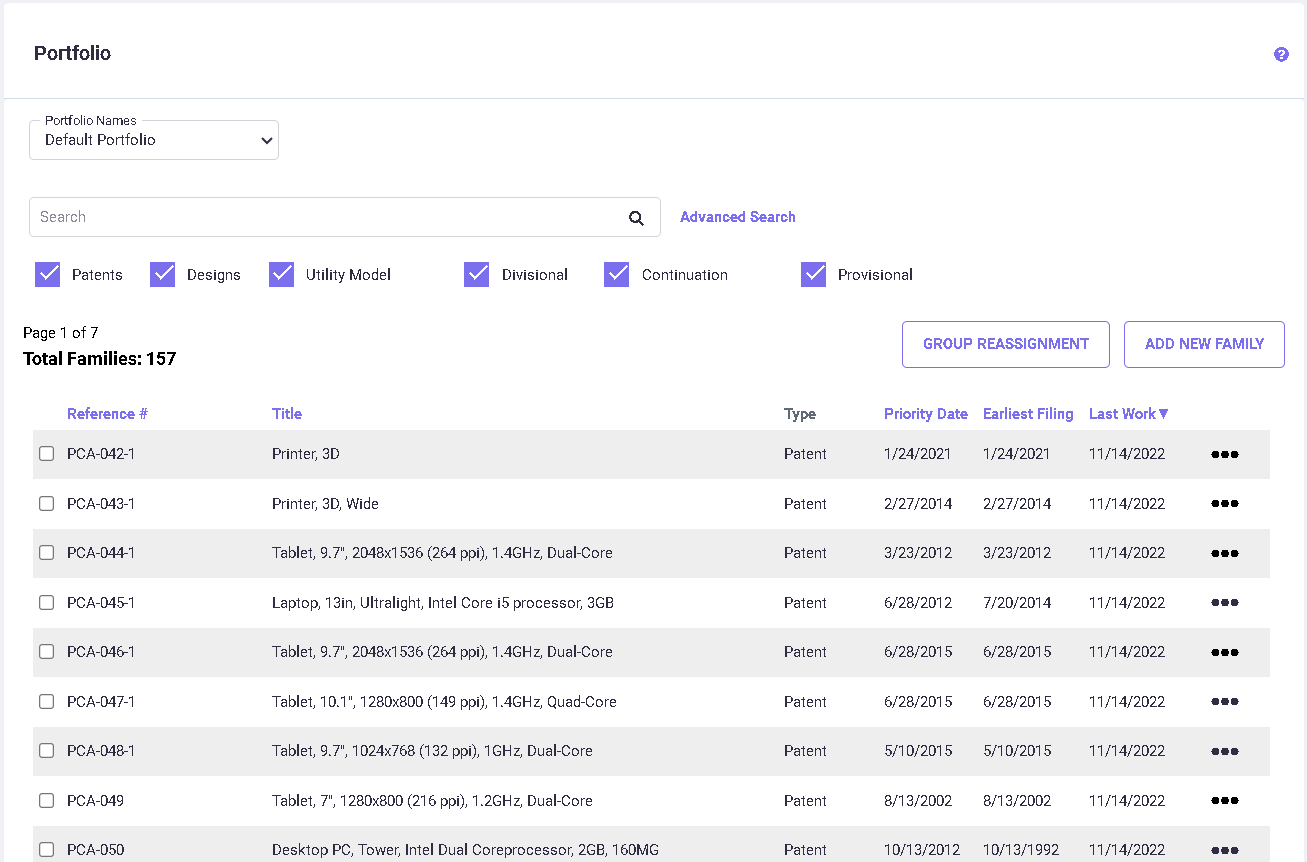
On the Portfolio screen, you can:
· View the list of families/subfamilies created/imported.
· Filter families by Application type (such as Patent, Design etc.,)
· Search select families/subfamilies through their IDs/Titles.
· Search select families/subfamilies using the advanced search options, with a wide range of options to search by.
· Add primary or subsequent families.
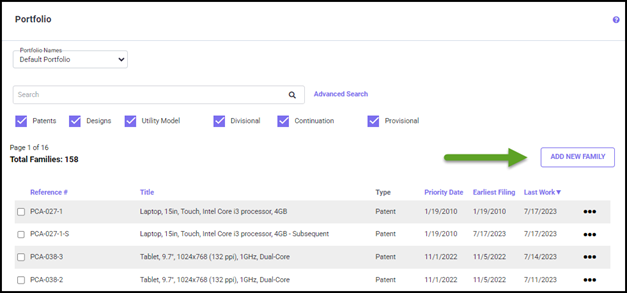
The Portfolio list displays available families in your portfolio. To change the portfolio list sort order, click on one of the headers (Family ID, Title, or Earliest Filing Date, etc.) and then click on the same header again to toggle the sort between ascending and descending order.
The
Advanced Search option (1) helps you to easily drill down into your portfolio to find what you are looking for. There are various filters provided in the Advanced Search settings. You can filter the families by Family ID/Title, Groups, Date Range, Application Type, and other criteria to run specific pivot table reports. You can also save the defined settings for future use. For more information regarding how to use the advanced filters and save settings, see
Advanced Search.
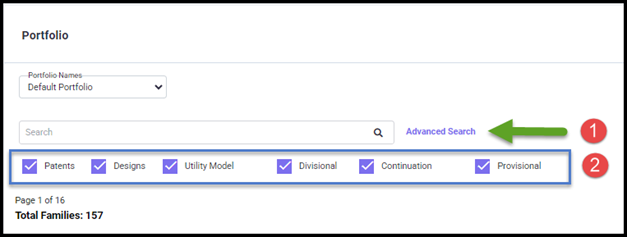
The checkboxes below the "Advanced Search" area (2) help you filter by application type. To filter, click the respective checkbox and the portfolio will show only the selected application type(s).
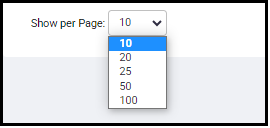
Using the “Show per Page” option, you can choose to view from 10 to 100 families per page.
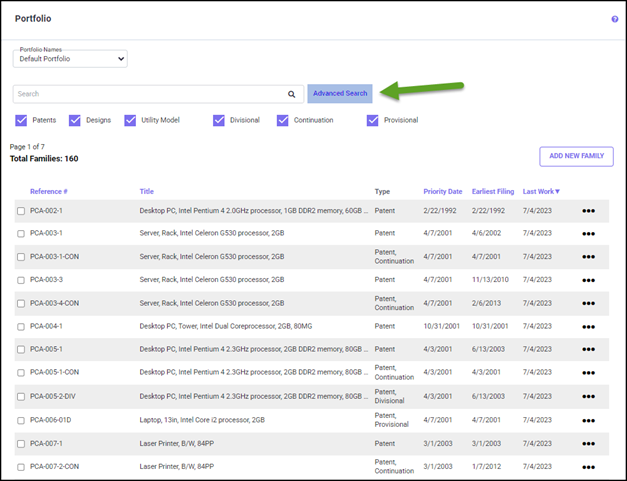
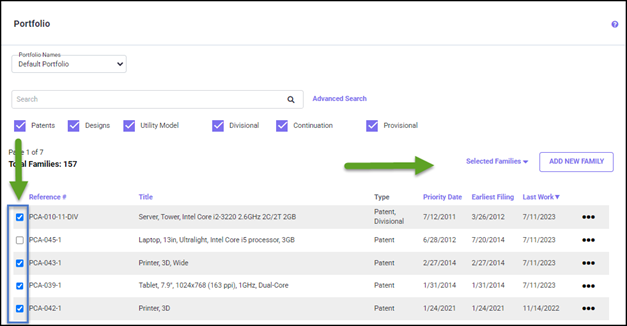
You can identify and select an existing family from your portfolio. There are several ways you can do this.
· Choose a portfolio name from the ‘Portfolio Names’ drop-down list (1) to select it. To add/delete/rename Portfolio names refer to the
Manage Portfolio(s) section.
· Limit the number of families displayed by searching on any part of the family ID or any part of the family Title. To do so, type your search criteria into the search box on top of the screen and click on the

icon (2).The search is not case-sensitive. For example, asking for any family containing the word ‘auto’, would list ‘Automotive,’‘New Automatic,’ etc. To see the entire list again, click on the
icon.
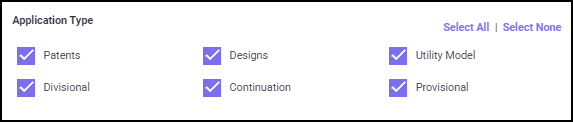
· Filter the application by Patents, Designs, Utility Model, Divisional, Continuation, and Provisional by checking/unchecking the respective checkboxes (3).
· By clicking the Advanced Search link (4), you have a whole range of options to search by on the Advanced Search screen.

The Advanced Search options help you to easily drill down into your portfolio to find what you are looking for. These options can be accessed on the Portfolio screen, as seen in the following figure. There are various filters provided in the Advanced Search settings (shown below). You can filter the families by Family ID/Title, Groups, date range, Application Type, and other report criteria to run specific pivot table reports. You can also save the defined settings for future use. The options available in the drop-down lists here are generated by the program based on the user inputs/imports and are uniquely based on individual user data.
Clicking on ‘Advanced Search’ leads you to the Advanced Search screen as shown below. To enable the search filter, click the respective checkbox to display the corresponding settings. Each search filter is discussed in detail below.
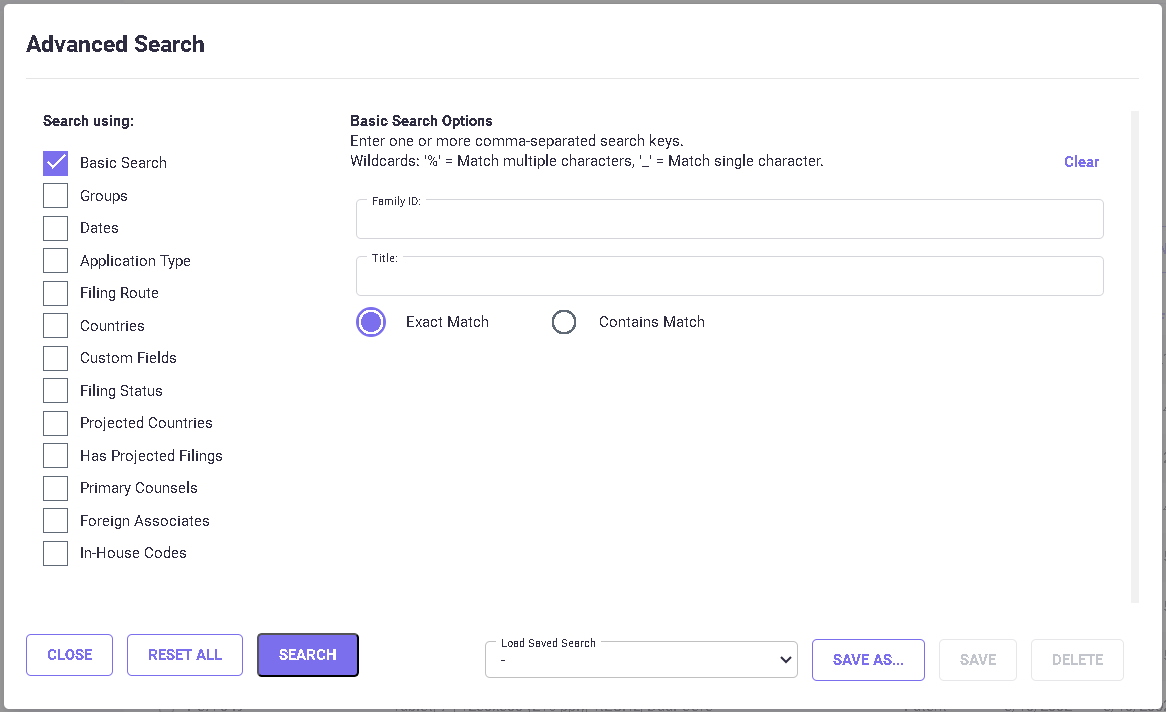
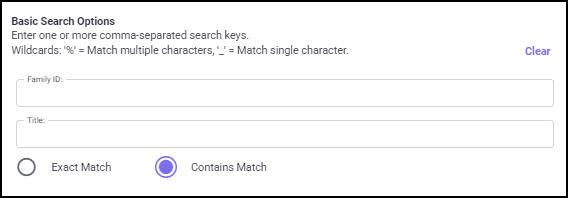
The Basic Search Options allows you to filter the Portfolio by Family ID and Title. When the radio button "Exact Match" is selected, the result shows the exact match of the Family IDs /Titles entered in the search input. The radio button "Contains Match" helps you to filter the search results matching the entered family ID/Title. The "Clear" option at the top right helps you to clear the search input.
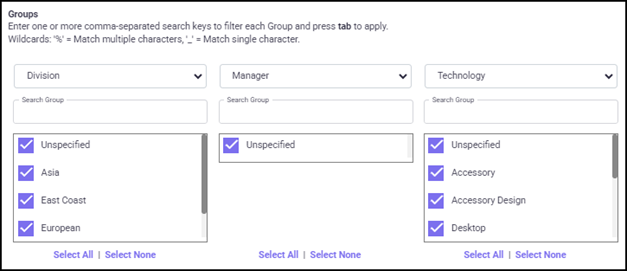
Groups: You may choose three groups, corresponding to each Group Category selected. To select group(s), click on the drop-down list and select the checkbox next to the group name(s). The Groups list is based on the Group Category selected and user input data.
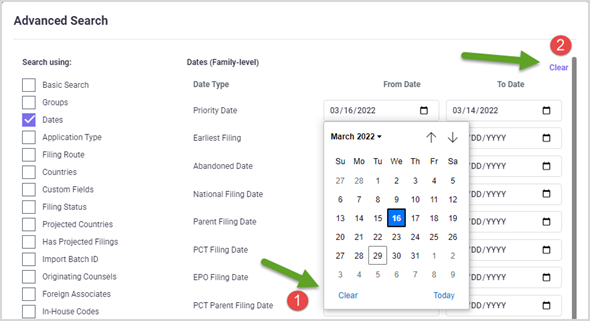
Dates: You can also search by entering a date range in any number of date type fields by checking the Dates checkbox.
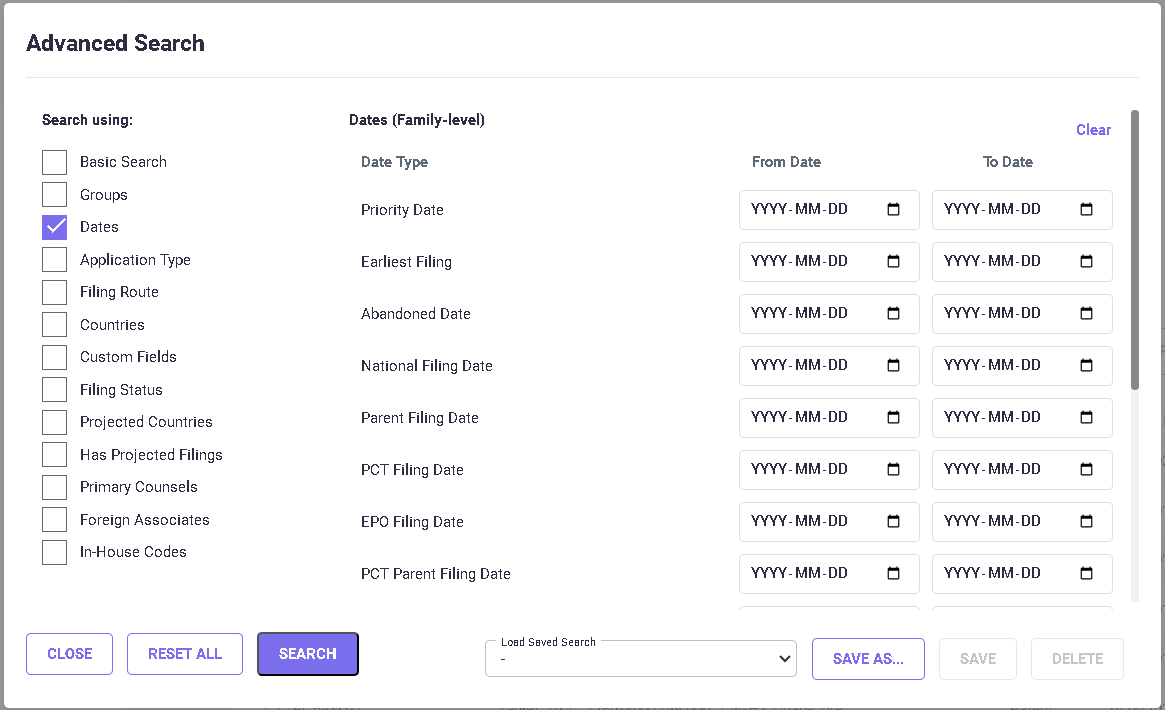
To select dates:
· First, enable the Dates option checkbox.
· Select a Date Type.
· Specify a date range by clicking on the ‘From Date’ and ‘To Date’ columns, then select the dates in the pop-up calendar. The selected dates are updated in the ‘To Date’ and ‘From Date’ fields.
· To delete a previously highlighted date, open the calendar for the selected date and click Clear (1). To clear all dates, click the Clear (2) option in the top right corner.
Application Type : Enable the ‘Application Type’ checkbox. Through this option, you can narrow down the portfolio data by selecting the application type(s) for your analyses. Data for only the selected application type(s) will be included in the Pivot Table report.
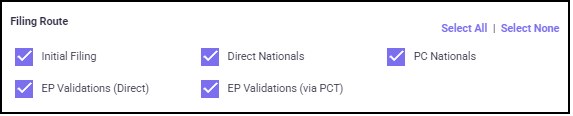
Filing Route : Enable the ‘Filing Route’ checkbox and select the ‘Filing Route(s)’. To search for families filed through a specific route, enable the corresponding checkbox.
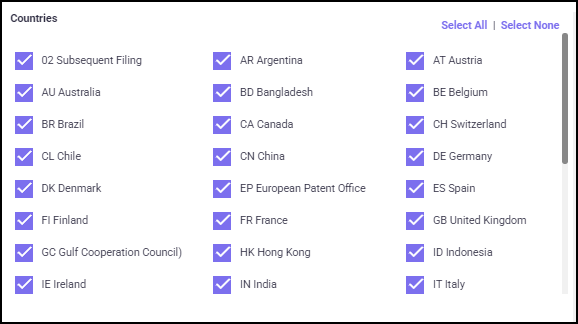
Countries: Enable the ‘Countries’ checkbox. This option allows you to filter the portfolio by choosing the specific filing countries. To search for families with applications filed for specific countries, check the boxes corresponding to the country name.
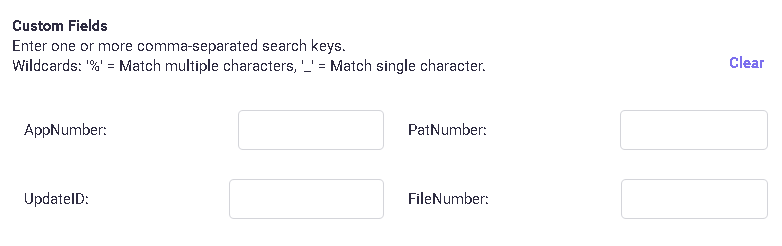
Custom Fields: Enable the ‘Custom Fields’ checkbox. Here you can search using identifying numbers such as the Application numbers, Publication numbers or Update ID. To search based on these options just type the numbers or keywords in the corresponding fields.
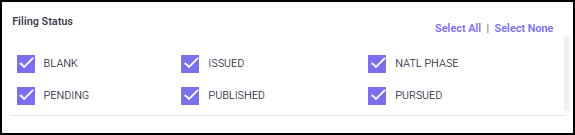
Filing Status: Enable the ‘Filing Status’ checkbox. Using this you can filter the portfolio data by the patent status.
Projected Countries: Enable the ‘Projected Countries’ checkbox. This option allows you to filter the portfolio by selecting one or more Projected countries from the list. To search for families with applications filed to specific projected countries, check the boxes corresponding to the country name.

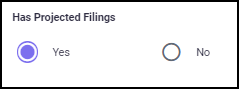
Has Projected Filings: This option helps you to search for families with or without projected countries added. Click on the "Yes or No" radio button to select the ‘Has Projected Filings’ option.
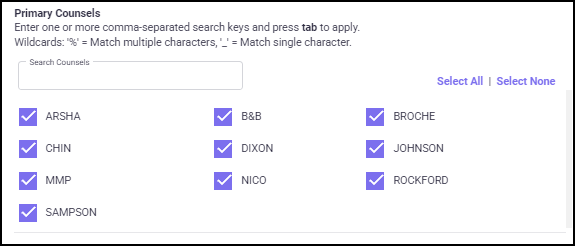
Primary Counsels: You can search families with specific Originating Counsel (defined through user Settings > Primary Counsel settings) assigned. Select the ‘Primary Counsel’ option from the drop-down list and check the box corresponding to the Originating Counsel name.
Used Foreign Associates: You can search for families with specific Foreign Associates assigned. Select the ‘Used Foreign Associates’ option from the drop-down list and check the box corresponding to the Foreign Associate’s name.

Used In-House Code: You can search for families based on the In-House codes they are using. For this select the ‘Used In-House Code’ option from the drop-down list and check the box corresponding to the desired In-House code.

On the bottom part of the screen, you have the option to save the settings that you customized on this page by clicking the SAVE AS button (1) and entering a Set Name in the text box (shown below) and click SAVE.
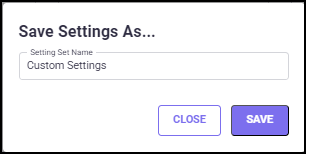
When you make changes to the saved set, click SAVE button (2) to save the changes made. To delete a created set, select the set to be deleted from the saved settings drop-down list, and click on the DELETE button (3).

Once you have set all the filters, Click SEARCH to get the search result. Clicking RESET ALL will reset all the search filters to the default. Click CLOSE to close the Advanced Search screen. Now you can see the families in your portfolio based on the search filter
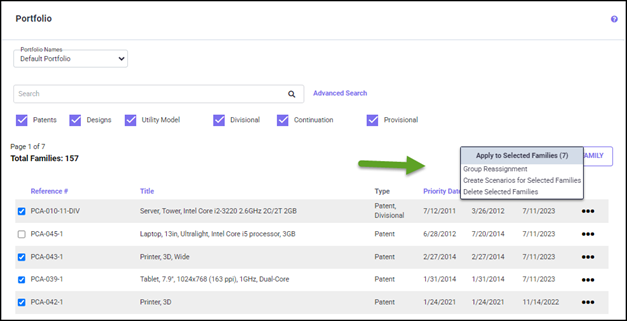
When you select families (or family) in the Portfolio screen using the checkboxes, the ‘Selected Families’ drop-down list appears (shown below).
Group Reassignment
Clicking on the ‘Group Reassignment’ option from the list will lead you to the
Group Reassignments pop-up screen (shown below), where you can reassign groups for the selected families. This feature is very useful in the budgeting and decision-making process since you can compare costs in families by reassigning groups with different projections (see the
Projected Filings sections for details) or gain visibility on the cost savings by reassigning groups with early abandonment defined (See the
Early Abandonment section for details).
Only Group Categories meeting certain criteria can be picked (see details in ‘
Reassignment of Groups’ section under Groups):
· Category cannot be a multi-group category.
· Category has the ʻAllow Group Re-assignmentʼ flag enabled (set via
Groupsʼ screen).
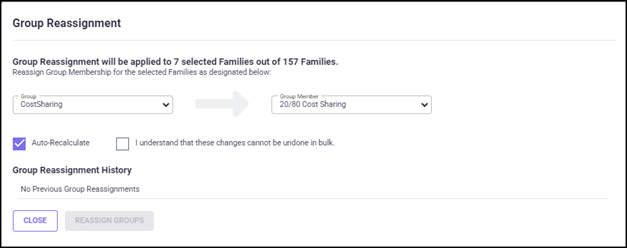
The ‘Group Reassignment’ option allows you to change the Group Category and Groups assigned to the families using the ‘Group’ and ‘Group Member’ options. The number of families selected for reassignment (out of the total number of families in your portfolio) is mentioned at the top. To reassign groups, select the Group and Group Member from the respective drop-down list. Click the "I understand that these changes cannot be undone in bulk" checkbox and click the REASSIGN GROUPS button to complete the group reassignment process.
Once you are done with the group reassignment, the ‘Group Reassignment History’ section lists all the families for which groups have been reassigned recently with details like Date, Username, Portfolio, Family ID, Title, Group, Old Group Name, New Group Name, and Cost difference (shown below).
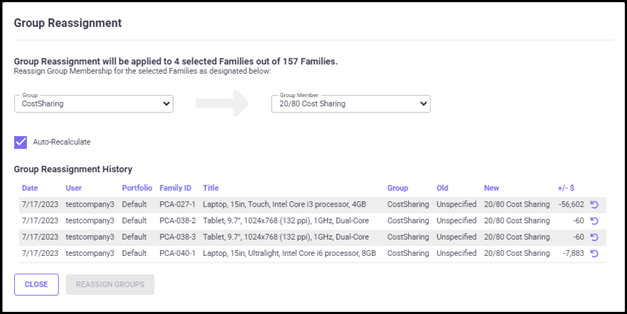
Using the

icon, you can undo the group reassignment for a single family.
The checkbox ʻAutomatically recalculate selected familiesʼ is checked by default, which allows your portfolio to be automatically recalculated during the group reassignment process.
Clicking CLOSE will close the ‘Group Reassignment’ pop-up screen and take you to the Portfolio screen.
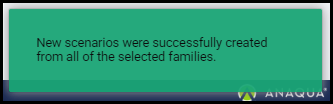
Create Scenarios for Selected Families
This option helps you to create multiple scenarios from the selected patent families. To create Scenarios, select the families using the checkbox. In the Selected families drop-down list, select the option "Create Scenarios for Selected Families". You will receive a successful notification.
Delete Selected Families
This option helps you to delete multiple families. To delete, select the families from the Portfolio screen using the checkbox. In the Selected families drop-down list, click "Delete Selected Families", and the following pop-up screen will appear.

Confirm your selection by clicking YES on the pop-up screen. Families, once deleted, cannot be reverted.
Instead of selecting an existing family, you may want to add a new family (Parent Application) to the portfolio. Clicking on the ADD NEW FAMILY button at the top right of the Portfolio screen leads to the New Patent Family screen (shown below).

The New Patent Family screen appears, where you need to
1. Choose the Application Type
2. Enter Application Dates (Priority Date and Filing Date)
3. Specify where it was (or will be) initially filed (whether directly to a country, such as the US, or through the PCT or EPO routes).
4. Enter a patent Title (required) and Family ID.
Using the Application Type option, you can choose to add a Patent, Design, or Utility Model application by selecting the respective radio button.
Initially, the Priority Date and the Filing Date will display the current date. You may change the dates manually in both the fields by entering a date in DD/MM/YYYY format.
Here you can choose the country of initial filing. If the “Favorite Countries” checkbox is checked, only countries you previously filed in will show up in the selection.
The Family Title field is for entering the title used for the new patent family (must be unique and less than 255 characters).
The Family ID field is a unique patent family identifier (less than 20 characters). The 'Auto-fill' checkbox on the screen is checked by default to increment the highest numeric saved. (For example, if the highest Family ID saved so far was 998, then this Family ID would be 999.) You may uncheck the ‘Auto-fill’ option and specify a different Family ID as per your requirement.
To go back to the Portfolio screen without creating a new family, click on the BACK button.
Clicking on the ADD PATENT button will create the new family and take you to the Edit Basic Details screen. Note: Please enable the "Add & Edit Basic Details" checkbox to continue entering the additional patent information.
Adding Direct National Countries
If you have only added the initial filing to a family earlier (or your docketing data has only the initial application filed), you may later want to add some direct applications to countries (filed through Paris Convention) to complete the family.
To add countries for direct applications, click on the countries list next to Direct Nationals and a drop-down list appears. To select one or more countries from the drop-down list, highlight the countries you wish to include.
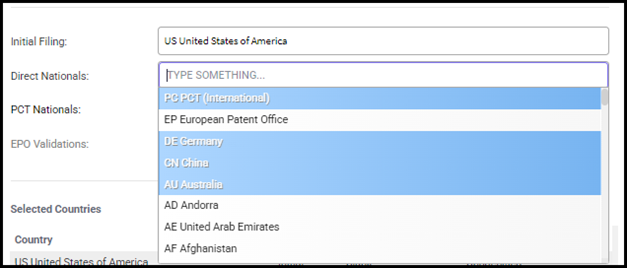
The Direct applications in the various countries selected in the Direct Nationals drop-down list above are added to the family and the program calculates and adds the National Filing Date for these filings (12 months from the Priority Date). You may change the filing date for these filings as per your requirement in the Edit Basic Details/ Family Dates screens.
Adding PCT National Countries
If you have filed a PCT International application and have selected PC PCT (International) in the Initial or Direct Routes, you may want to add some PCT National countries to the family.
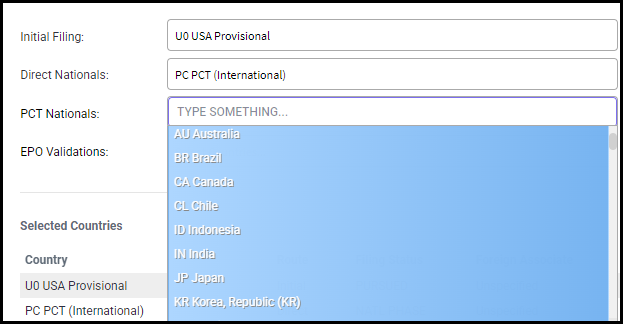
To add countries for PCT International applications, click on the countries list next to PCT Nationals and a drop-down list appears. To select one or more countries from the drop-down list, highlight the countries you wish to include.
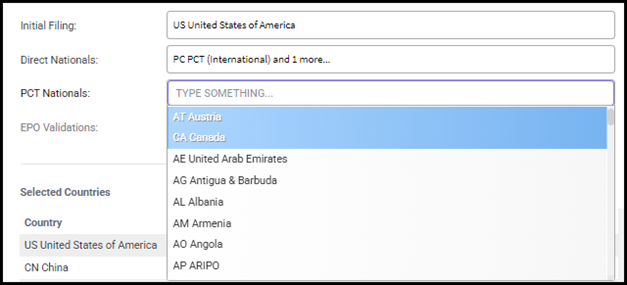
Only countries that are in the PCT (and that have not already been selected to file directly) are displayed in the Available Countries list.
Adding EPO Validation Phase Countries
If a family has an EPO application filed through the Initial, Direct or the PCT routes, you may want to add some EPO Validation countries. To add Validation countries for an EPO application, click on the countries list next to PCT Nationals and a drop-down list appears. To select one or more countries from the drop-down list, highlight the countries you wish to include.
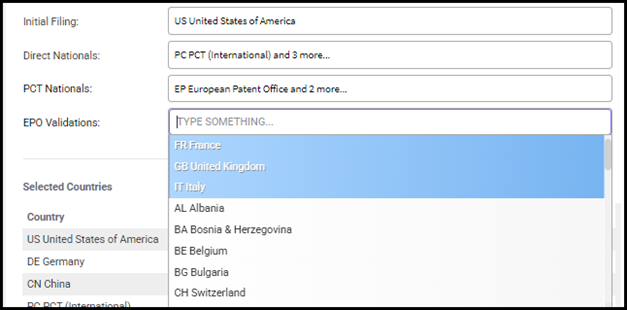
Only countries that are in the EPO (and that haven’t already been selected to file either directly or through the PCT) are displayed in the Available Countries list.
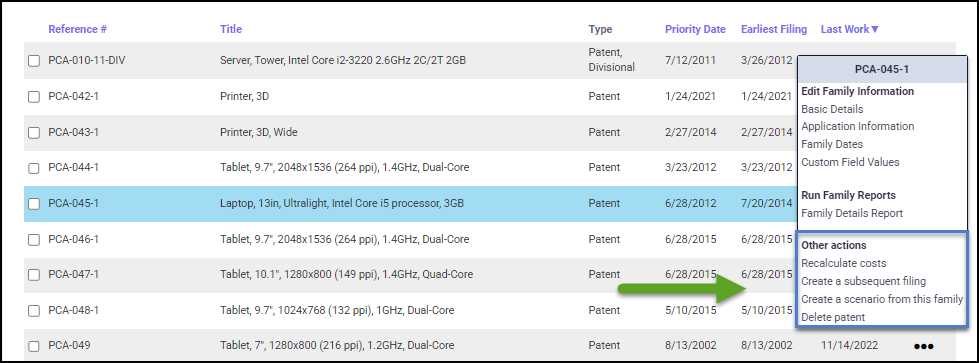
After selecting the family, clicking on the three-dots settings menu will open the following pop-up screen (shown below).
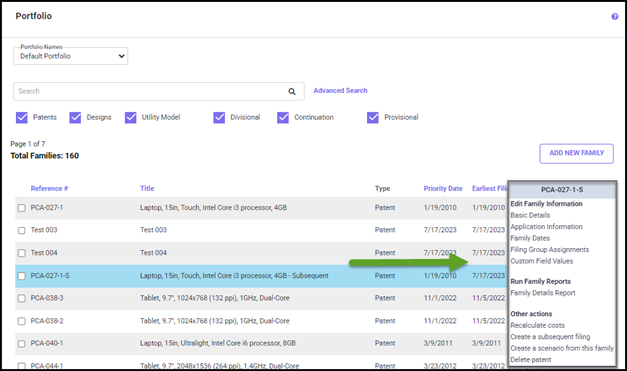
All the options for working with one family start from this screen, such as:
· Viewing or changing the basic data for the selected family.
· Calculating the costs and dates (or Family Dates).
· Viewing the families’ dates and costs via reports.
· Viewing the Family Details report.
· Recalculating cost for the selected family.
· Creating a subsequent filing.
· Creating a scenario from the selected family.
This chapter describes how to view/edit family details using the options on the three-dots settings menu (shown below).
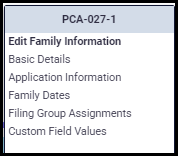
The Edit Family Information settings option allows you to edit the following:
EDIT BASIC DETAILS
The ‘Basic Details’ option on the three-dots menu leads to the following screen (shown below), which allows you to edit basic details of the selected family. The Edit Basic Details screen allows for a variety of filing strategies via the combination of appropriate route and country lists. Some fields are already filled in because they were automatically initialized with values from an import process or from the New Patent Application screen (discussed previously in the ‘Add a New Family’ section) and/or were manually updated with subsequent editing. The following sections describe typical paths for setting up/editing a family with a multi-country filing.

The Edit Basic Details screen shown above is used to enter or change the following ‘basic details’ concerning a family:
· Priority Date of family
· Initial Filing Date of application
· National Filing Date (filing date for direct filings)
· PCT/EPO Filing Date
· Abandoned Date (used to suppress costs for all countries at a certain point in time)
· Parent Filing Date (used by Continuation/divisional patent families)
· Country of Earliest Filing designated by drop-down list – Initial. (e.g. - the Country of Initial Application)
· Other countries connected to this family designated by route with drop-down list – Direct, PCT Nationals and EPO Validations
· PCT Offices used for the filing, search, and examination (if filing through the PCT)
· Groups associated with this family
· Primary Counsel prosecuting this family
· In-House Code assigned to this family
· Family information – the application type (Patent, Design or Utility Model), whether the family was imported or not, whether the family is a continuation/divisional or not, and whether PCT chapter II filed is applicable.
The Family ID, Family Title, Country of Earliest Filing, and all the dates contain the values given when the family was added to the portfolio (either through the Add New Family option or through a batch import process).
Specifying abandoned dates will exclude the costs that would occur after the Abandoned Date. These costs will then be excluded from the calculation and reporting process. The Abandoned Date field shown here applies to the entire patent family. To specify abandon dates for individual filings, use the ‘Family Dates’ option. For more information on abandoning individual filings, see Family Dates.
Note: You cannot enable both the continuation and the divisional checkboxes in a patent family. If you try to enable both Continuation application and Divisional application checkboxes, only the most recently enabled checkbox will be active.
Country Selection
To select/update the filing countries, use the drop-down list next to the route (such as Initial Filing, Direct Nationals, PCT Nationals, and EPO Validations). To select one or more countries from the drop-down list, highlight the countries you wish to include (shown below).
You can see the summary of countries selected under "Selected Countries" with their filing status and Foreign Associate. To edit/update the Filing Status and Foreign Associate information for a particular country, click on the country you wish to edit.
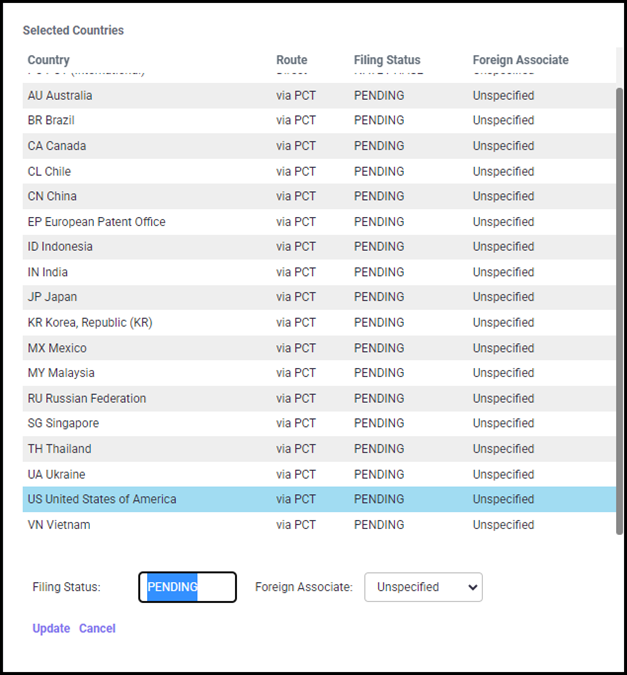
You can manually change the Filing Status in the text area next to it. You can also update the Foreign Associate from the drop-down list. Once you have made the changes, click Update to save the changes.
PCT Offices
The current PCT Offices settings (shown below) are displayed in the Additional Information section of the screen.
The calculation of a PCT application is affected by where the search and examination will be performed. Likewise, fees associated with sending a completed PCT application to the receiving office vary by Patent Office.
Initially, these PCT Receiving, Search, and Examination offices are set to the user-specified defaults. To change one of these offices, click on the appropriate drop-down list and select a desired country. Based on the Receiving Office selected, the ‘International Search Authority’ and the ‘International Preliminary Exam Authority’ list boxes will display the relevant offices.
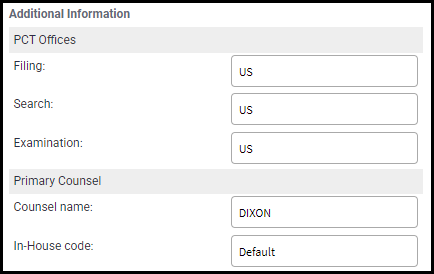
Primary Counsel
In the Additional Information section of the screen, the Counsel name and the In-House code for the family are displayed under the Primary Counsel section (shown above).
To change the Counsel name and/or the In-House code for the family, click on the appropriate drop-down list and select the name or code from the list.
Assigned Groups
When running a portfolio cost analysis, it is sometimes helpful to see the data in the reports grouped (i.e., totaled and charted) in certain ways (for example, by division, technology, and/or manager). Groups can be assigned at the Family level using the ‘Assigned Groups’ option on the Edit Basic Details screen or at the Filing level using the ‘Filing Group Assignments’ option on the three-dots menu of the Portfolio screen.
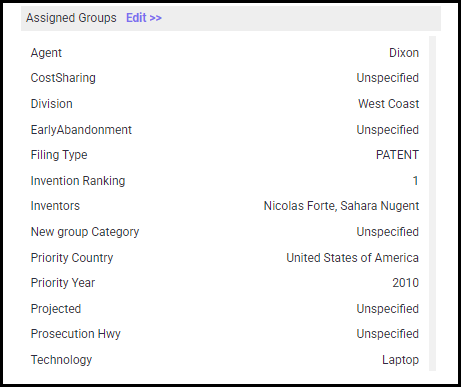
To change any of the groups, click on the Edit >> link next to the Assigned Groups section. The Group Assignment pop-up screen appears (shown below). Group Categories are listed on the left side of the screen and Groups under each Category are listed on the right side with a drop-down arrow provided to see and select the desired Group. Use the down arrows to change the group assignment for a Group Category.

The group definitions may be specified via the Groups Definitions screen and are discussed in detail in the Groups section.
Once you have updated the basic details for the selected family, click on the "UPDATE AND EDIT APPLICATION INFORMATION" button to save the changes and go to the Patent Application Information screen.
Click BACK to go to the Portfolio screen without saving the changes.
APPLICATION INFORMATION
The Application Information Settings allow you to enter the application-specific information that affect costs such as the number of pages in the application, the number of pages of drawings, the number of claims, etc., for the initial filing, and the national applications filed through various routes (Direct, PCT or via EPO).
1. A screen for the General family default (For countries without custom values),
2. A Country-specific application information screen for all the filings routes (Direct, PCT or via EPO).
Based on the application type and destinations you have selected for the filings; various attributes of the application will automatically be selected and will appear in one of several
Patent Application Information screens. Initially these screens will have system/user defined default values entered for your convenience, which you can edit as per your requirement.
Family Defaults
In the Patent Application Information screen, "Family defaults" is the first option. Here you can edit general information common to all countries/destinations.
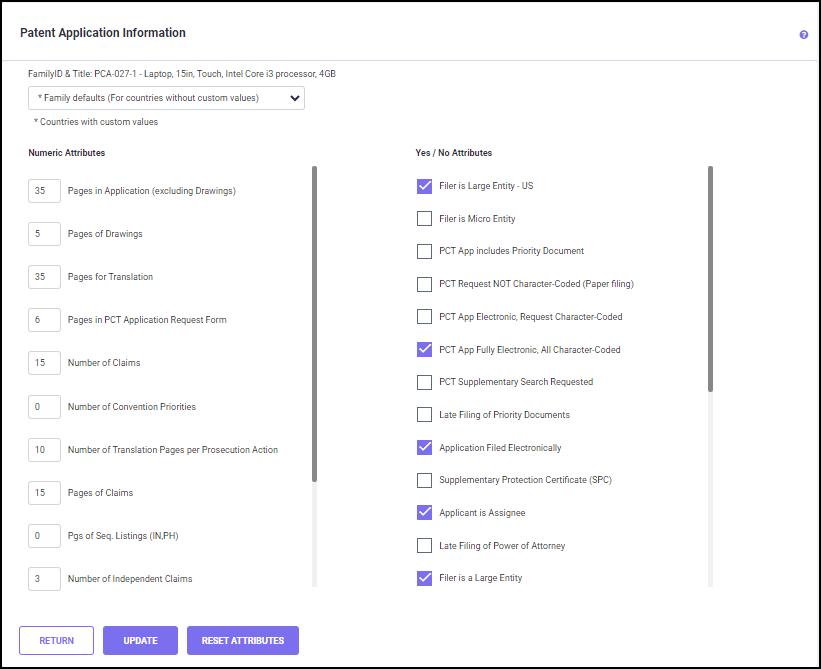
Attributes (for example, Pages in Application (excluding Drawings), Pages of Drawings, Number of Claims, etc.) are listed on this screen. The Value fields require Numeric or Yes/No information.
· Numeric information is entered into the Value fields on the left side of the screen.
· Yes/No information is entered into the Value fields on the right by enabling/disabling the checkbox.
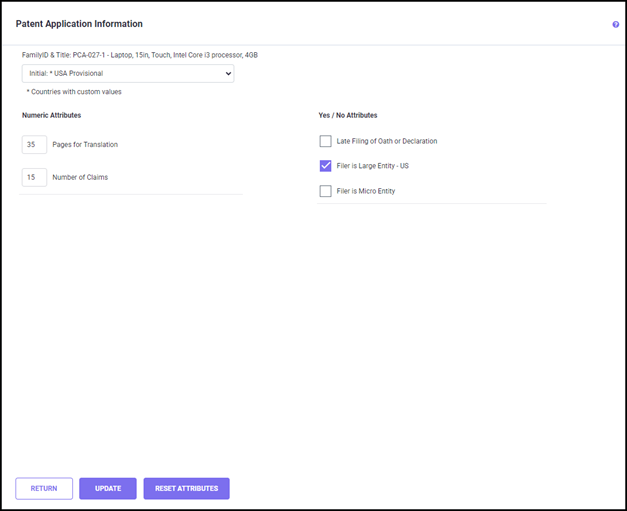
Through the drop-down list at the top, you can navigate to the initial application or country specific application information screen (shown below).

Initial Application
Country-Specific Application Information
You may also enter Application Information for a specific country that is different from the ‘Family defaults’ information used for all countries. To do so, select the country you wish to edit (Direct, the PCT or EPO) from the drop-down list. This displays another Application Information screen (shown below) for the selected country. After entering information, click UPDATE to save the changes. The countries with user defined application information values are indicated by a star prefix in the list.
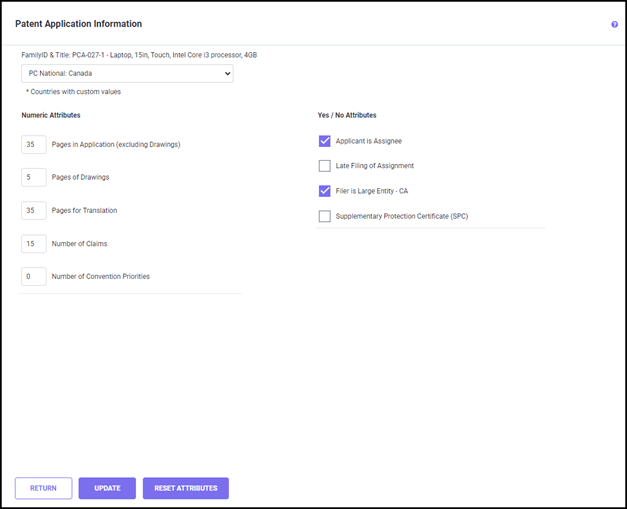
Once you have made changes to attributes, click UPDATE to save the changes.
To remove a user defined value for a country, select the country from the drop-down list and click RESET ATTRIBUTES. The custom values will be reset to default values.
Clicking RETURN will take you back to the Portfolio screen without saving the changes
APPLICATION DATES
Use the Application Dates option to change dates in the patent family.

For example, after reviewing some of the reports, you may decide that the Grant process for a particular country will take 6 months more (or less) time. As this may affect costs in your estimates, you may want to enter the new date, recalculate, and see the different effects in the new reports. This and other modification of the dates for the filings in the family is possible using the Family Date screen. Additionally, you can enter the Abandoned dates and filing status of your patent application/patents in particular countries. The costs that would occur in those countries after the Abandoned date specified on this screen will then be excluded from the calculation and reporting process.
The dates on this screen are categorized into three types and colored. There is a color key in the upper right corner on the screen. As noted on the screen, dates that were previously defined by a user or from the import file are displayed in green and red. Dates that you change on this screen are also displayed in green. Dates that the program calculates (estimates) are displayed in the color black. Any filings based on projections will show up on this screen in blue.
Using the edit icon to open the pop-up screen, you can update the dates (such as Filing, Exam, Grant, and Abandon Date) as well as Filing Status. Clicking on an existing date or an empty cell will cause a calendar to appear. Using the calendar, you can enter, delete, or change the date.
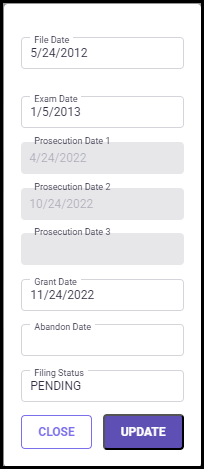
The filing status of each filing in the selected family can be modified by updating the text in the status/empty cell.
Once you have updated the filing date and/or Filing Status, click UPDATE to save and return to the Application Dates screen.
Clicking CLOSE will exit the pop-up screen without saving any changes.
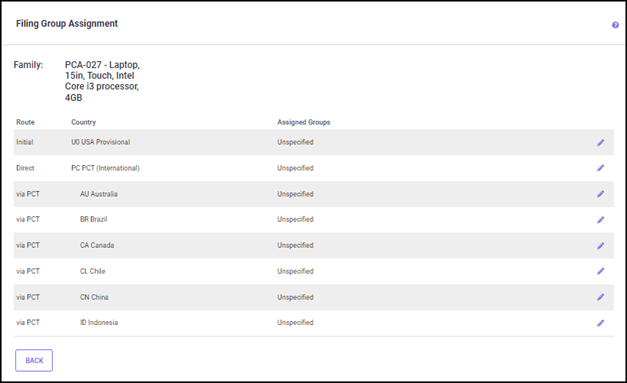
FILING GROUP ASSIGNMENT
When you select the ‘Filing Group Assignments’ option from the three-dots menu, the following screen appears.
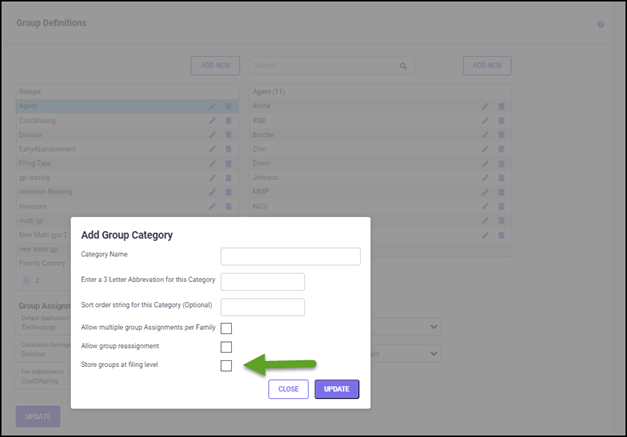
The Edit Filing Group Assignments setting is enabled and appears on the three-dots menu of each family in your Portfolio screen only when
· you have different groups assigned for each filing in a family in your import data.
· the ‘Store groups at filing level’ option enabled for a Group Category under the Groups through the import process or manually added a new Group category with the ‘Store groups at filing level’ option enabled (shown below).
On the Filing Group Assignment screen, you can assign a different group (under a Group Category with ‘Store groups at filing level’ enabled) for each filing in the family using the ‘Assigned group in selected category’ drop-down list.
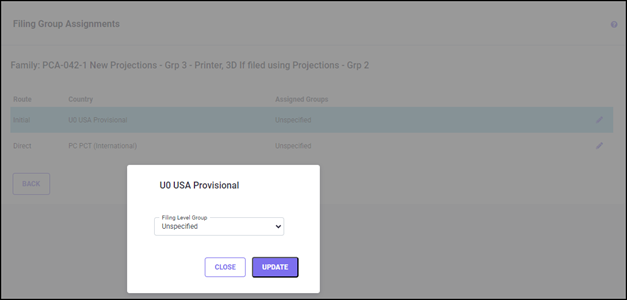
Click on the UPDATE button to save the changes made on this screen. Click CLOSE to exit from this screen without saving the changes.
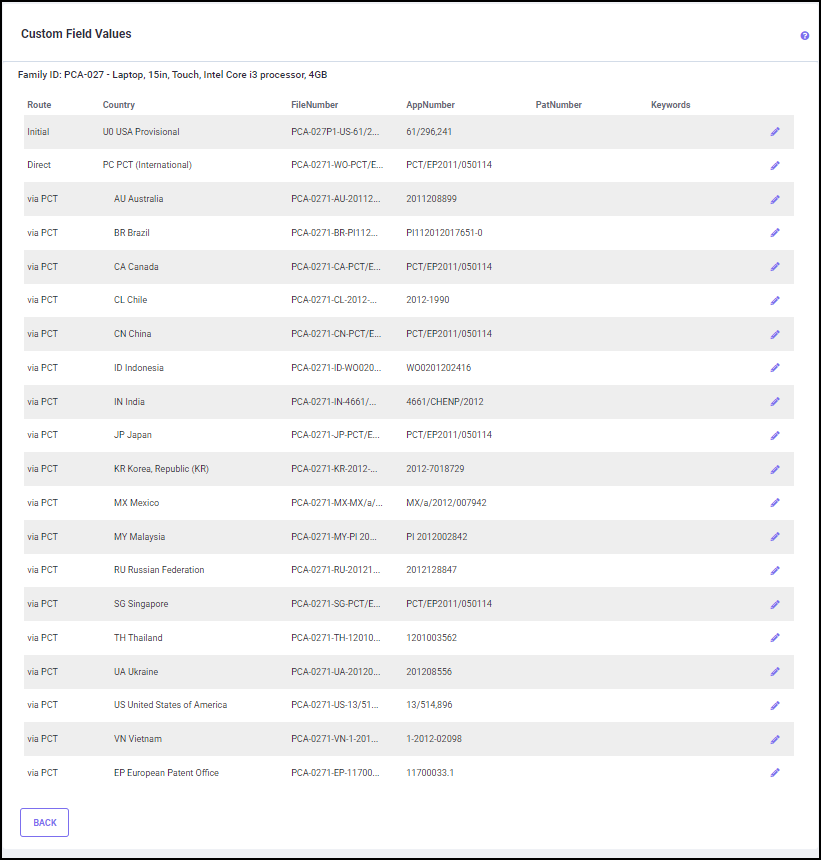
CUSTOM FIELD VALUES
The Custom Field Values Screen (shown below) is used to enter identifying information (such as FileNumber, AppNumber, PatNumber, and keywords) and other optional custom values for each member of the family. This screen shows only the preferred custom fields selected in the Custom Fields screen. To edit, select a filing country for which you need to enter or update the custom values and click the edit icon to right of the selected country.
The below screen appears where you can enter/update the identifying information. Now, enter the optional information in the appropriate field(s). Since these text fields are not mandatory and are for informational use only, any (or all) of these cells may be left blank. They would usually be filled in automatically by imports. The selected country name is displayed at the top of this screen.
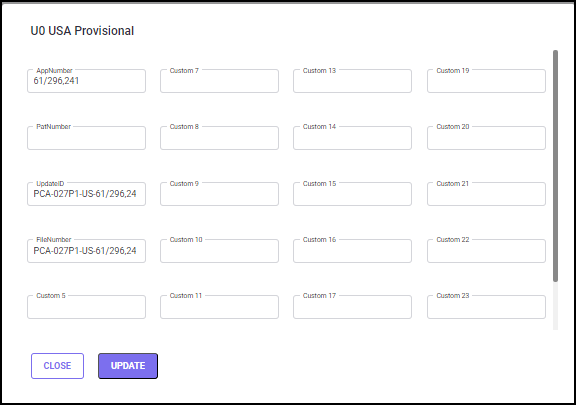
For Each country/filing we have the following fields: AppNumber for entering the application number in the country, PatNumber for the Patent Number, Update ID, Notes / Keywords, and other identifying numbers Custom 5 - 23.
For each filing, under the Notes/Keywords column, a reference text can be added related to that filing. This text content can be used to retrieve the filing data while doing Advanced Portfolio Data searches.
Click on the UPDATE button to save all changes.
Click on the CLOSE button to return to the Custom Field Values screen.
Family Details Report
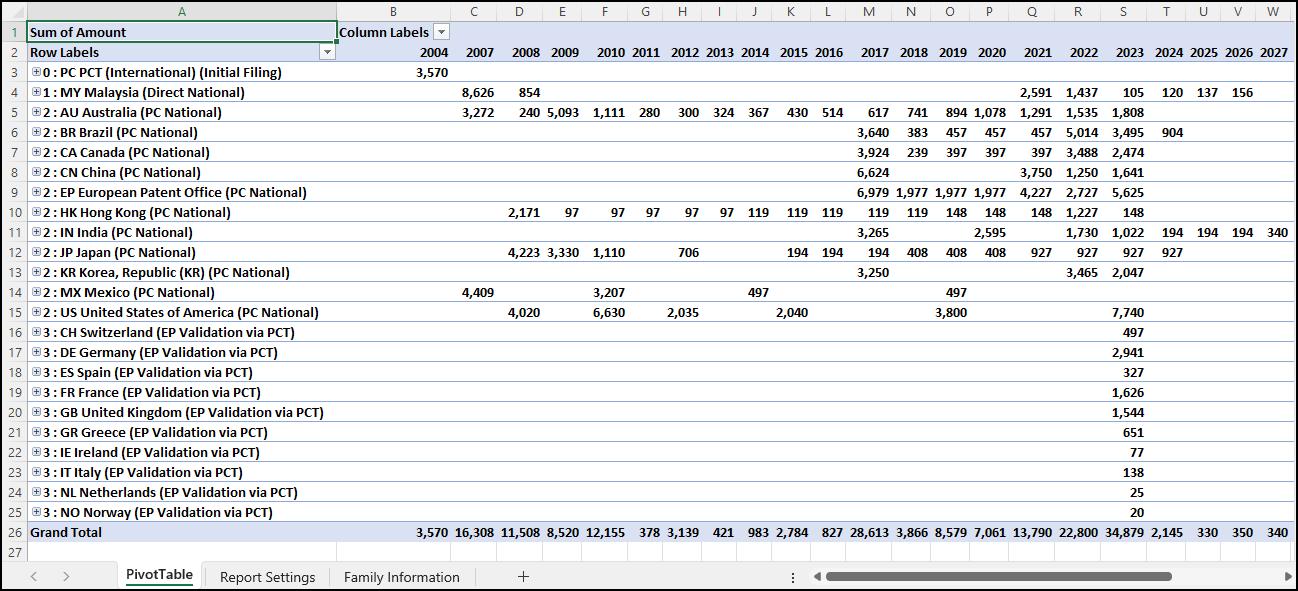
The ‘Family Details Report’ option creates a report in MS Excel spreadsheet format, with costs itemized for each patent application (approximately one report page per country). The Family Details report will show the report date, page number, and Scenario Title followed by the stage and category cost estimates for that country. Stages include Filing, Examination, Prosecution, Granting, and/or Maintenance. Categories include official fees, associate charges, and/or translation costs. The maintenance fee estimates are displayed at the bottom of the report page (shown below).
Once you click the Family Details Report option from the three-dots menu, this will initiate the calculation and you will be directed to the Download Reports screen, where the generated Family Details Report is ready for download.
The following four options are available under ‘Other actions’.
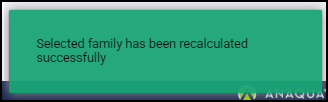
Recalculating Costs
When you select the Recalculate Costs option from the three-dots menu, the patent costs will be re-calculated for the selected family and when it is done, a notification appears at the bottom right corner of the screen (shown below).
To recalculate the entire portfolio, see
Recalculate Portfolio. While the time needed to calculate one individual patent family may only be a few seconds, the amount of time can be significant when recalculating an entire portfolio. Therefore, this option is very useful if you quickly want to see the effects of updates/Edit menu changes in the estimate report for a particular family.
Creating a Subsequent Filing
When you select a patent family and click this option from the three-dots setting menu, the following screen appears.

In the New Patent Application screen, the Application ID, Title, and Priority Date are copied from the Parent application (family selected on the Portfolio screen). The Filing Date is the date when the subsequent application is created. The Application ID will have an "S" at the end to denote subsequent filing. Clicking on the ADD NEW PATENT button creates a subsequent application and a notification appears at the bottom of the screen (shown below).
Once the Subsequent application is created, you can update the necessary information (such as filing countries, route, application type, group assignments, PCT offices, Primary counsel, attributes, and family dates etc.,) by selecting the newly created family from the Portfolio screen.
Click BACK to return to the Portfolio screen.
Creating a Scenario from this Family
This option allows you to create a scenario from the selected family in the Portfolio screen. Once you click the option "Create a scenario from this family" from the three-dots menu list, the web page creates a scenario, and a notification appears at the bottom of the screen (shown below). The newly created scenario replicates the patent family from which it is created. You can update the basic details, countries, routes, attributes, and family dates as per your need to generate a forecast report.

Deleting a Patent Family
The Delete Patent option from the three-dots menu helps you to delete a Family. To delete, select the family from the Portfolio screen and click the three-dots menu icon. Now, click "Delete patent" on the list and the following pop-up will appear.

Confirm your selection by clicking YES. Once a family is deleted it cannot be reverted.